Category: Hardware

[DIRECT] Powersupply
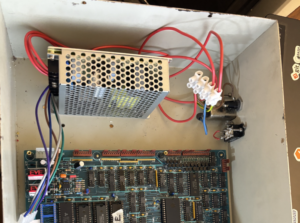
Direct’s orignal powersupply was probably something thrown together in haste. No PCB, it had regulators and capactitors soldered together and initially when I was rebuilding the machine, I had to rebuild that as well. It always felt a bit hairy and when I noticed a lose solder joint recently I figured it was time to […]
Read more »[Zyklus] Running the Zyklus on the MCLZ8
After having new MCLZ8 boards created, this time with the components pre-populated (and thanks Paul for guiding me through the ordering process on that), I now have a working MCLZ8 emulator running. The emulator supports various modes, two of whcih are interesting for us: Mode 0, which means the emulator runs without acceleration, using external […]
Read more »[Zyklus] PaulMC
I want to introduce our user PaulMC a bit. This gentleman has been responsible for a lot of the succeses we’ve had. He took the schematics and created new PCB layouts and basically nailed them in the first try. Then he surprised us with a completely redesigned modern power supply, suitable as a drop-in replacement. […]
Read more »[Zyklus] Long overdue update
It’s been a while – I’ve been a bit busy. But here we go. A new Zyklus is born. Actually, quite a while ago, User PaulMc and myself managed to finsih building the first version of the mainboard. While there were one or two little bugs, it ended up working quite nicely! So with that, […]
Read more »[Zyklus] Clone update 2
So after spending some time debugging and not getting why the new button panel board didn’t work, as it measssured exactly how it should following the schematics, and after basically replacing every TTL chip (I did find some dodgy ones), it was time to start comparing it to the original and soon enough the issue […]
Read more »[Zyklus] Clone update
We have a great little community going in the discord server. One user, PaulMC, has created the KiCad files for the 3 PCB’s and had a first run printed. We’re trying to build these. I’ve started with the button panel PCB:
Read more »[Zyklus] Second Zyklus machine
Things are getting a bit crazy, as a second Zyklus has shown up at my door. Actually, this machine was Pete’s and suffered moisture damage. It was considered dead, but recently it actually did show some signs of life. Given the rarity, all the more reason to refurbish. Besides that, now I can use this […]
Read more »[Zyklus] Recapped the powersupply
Recieved the new capacitors (Axials too) to recap the whole Zyklus. Yesterday, I started with the powersupply, as that is the most important part and these capacitors have to work the hardest. This is the powersupply board. It has three 4700uf 16v axial caps: The procedure is quite simple: Desolder the old cap Clean the […]
Read more »[Zyklus] Did some more shopping
Going to recap the whole unit. It’s actually not that bad, only a few needed: Shopping list: 3x 4700uF 16v (originals are axials, but with a bit of creatativity, I’ll use normal radials. 3x 220uF 16V (there’s one on the switch/display board as well) 2x 10uF 50v 1x 100uF 6.3V These things are dirt cheap, […]
Read more »[Zyklus] Display repair part 1
Ever since I got it, the display would flicker or need a tap or two every so often to have its backlight working. Felt like a typical loose connection, so I took a look and quickly determined that the inverter was the culprit. Time to take it apart: It’s a transforer, transitor, some caps […]
Read more »[Zyklus] Parts…part 3 (still to order).
There’s still a lot I need: all capacitors, resistors and diodes. I have a lot, but I need to count & make sure I have enough of every type needed. Power supply transformer. Keeping an eye on Ebay. The original unit is still being made, but only to order in large quantity. Also looking for […]
Read more »[Zyklus] Parts…part 2 (I/O)
Encoders: Buttons. These are pretty close to the original but no doubt less sturdy. Although for now they feel fine. Grey colored buttons are still in transit. I got Red, black, Yellow, Blue – all with LED: LCD Display (just a generic 40×2 – one of many I have. I’m waiting for OLED’s to become […]
Read more »[Zyklus] Parts…part 1 (chips)
The CPU and IO related chips: TTL Logic: Memory: Op-amps & opto couplers: EPROMS:
Read more »